Cover-Up Tattoo: Plan the Design From a Photo, Then Make the Stencil
• by DND Applications • 8 min read
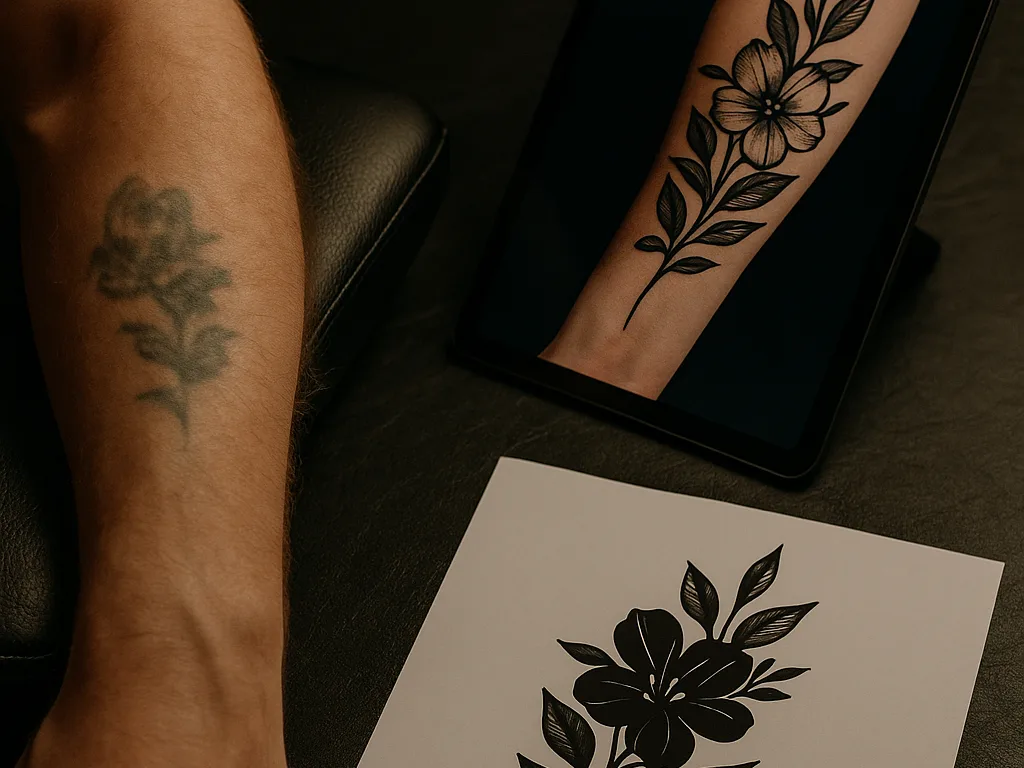
Cover-up design is the one place where the old tattoo has to be in the room the whole time. The new piece has to be bigger, darker and busier in exactly the places the old one is, and the only way to plan that is on a photo of the actual arm. Most cover-up advice stops at ideas: florals, blackwork, darker is better. This guide goes from the photo of the old tattoo to a printed stencil, with the planning step in between that most people skip.
Key takeaways
- Photograph the old tattoo straight on in daylight and plan the new design directly over that photo, at real size.
- What covers: dense areas of dark ink, bold outlines, and designs whose busiest parts land on the old tattoo's darkest parts.
- What does not: light colours, open fine-line designs, and anything the same size as the old piece. Plan for two to three times the area.
- Try the plan on the photo, agree it with the client, then convert to a stencil that marks the outlines and the shading boundaries.
Step 1: Photograph the old tattoo
Straight on, in daylight, with the limb in its natural position and a ruler or tape in the frame for scale. Take a second photo from the angle people usually see the spot. These photos are your canvas for the whole plan, so they need to be sharp and evenly lit; a shadow across the old tattoo will hide exactly the dark area you need to see.
Step 2: Read what you are covering
Mark the darkest parts of the old tattoo. Those are the areas the new design must put its own darkest work over, because black covers black and nothing covers black with grey. Mark the outline, which tends to be the most stubborn part. Note faded or blown-out areas, which are easier. If the old piece is heavy black, a laser session or two before the cover-up widens your options; say so early rather than promising a design that cannot work.
Step 3: Choose a design that covers
Cover-ups are bigger than the original, usually two to three times the area, so the eye reads the new piece and not an edge. Designs with built-in dark mass work: florals with dark leaves and shaded centres, blackwork, Japanese pieces with background, animals with dark fur or feathers. Fine line, light colours and designs with open space over the old tattoo do not cover and should not be promised. Our composition guide covers how to lead the eye away from a spot.
Step 4: Plan it on the photo
Place the new design over the photo of the old tattoo at real size and move it until the new design's darkest areas sit on the old tattoo's darkest areas. Stencify's try-on does this with the client's own photo: import it, drop the design on, scale and position. Where a dark line of the old tattoo would show through an open area of the new one, enlarge the design, shift it, or add an element there. Agree the plan with the client on the screen; this is the point where a cover-up succeeds or fails, and it costs nothing to change here. The try-on guide covers taking the photo.
Step 5: Make the stencil
Convert the agreed design into stencil line work. For a cover-up the stencil needs two kinds of line: the outlines, and the boundaries of the areas that will be packed dark. Mark the shading boundaries as light guide lines so the artist knows where the dark mass must reach to hide the old work. Size the stencil to the measurement from the photo, not to the design file, and print at 100%: sizing and printing at actual size.
Step 6: Transfer over the old tattoo
Stencil solution and transfer work the same over old ink, with one difference: the purple stencil lines are harder to see over dark areas. Use a lighter stencil pressure and a brighter lamp, and photograph the applied stencil over the old tattoo before starting, so you have a record of where the plan said the dark areas go once the stencil begins to wear. Transfer method in full: how to use tattoo transfer paper.
Plan and print it in Stencify
Convert the new design, place it over a photo of the old tattoo at real size, adjust until it covers, then export a PDF sized for stencil paper. Stencify runs on iPhone, iPad and Android, and the first two uses are free: get Stencify on the App Store or on Google Play.
Frequently asked questions
How much bigger does a cover-up tattoo need to be?
Usually two to three times the area of the old tattoo, so the new design has room to put dark mass over the old dark areas and the eye reads the new piece rather than an edge.
What tattoo designs work best for cover-ups?
Designs with built-in dark areas: florals with shaded leaves, blackwork, Japanese pieces with background, and animals with dark fur or feathers. Fine line and light colours do not cover.
Can I plan a cover-up on a photo of my tattoo?
Yes, and you should. Place the new design over a straight-on photo of the old tattoo at real size, and move it until its darkest parts sit over the old tattoo's darkest parts. Stencify's try-on does this with your own photo.
Does the stencil for a cover-up differ from a normal stencil?
It should include light guide lines marking the boundaries of the areas to be packed dark, not only the outlines, so the artist knows where the dark mass must reach to hide the old work.
Related reading
- Tattoo Try-On - placing the design on the client's photo
- Mastering Tattoo Composition - leading the eye away from the old piece
- How to Size and Print a Tattoo Stencil - sizing from the photo
- How to Use Tattoo Transfer Paper - transferring over old ink
Plan it on the photo, print it as a stencil
Stencify previews the new design over a photo of the old tattoo and exports the stencil at real size.