Handwriting or Signature Tattoo Stencil From a Photo
• by DND Applications • 6 min read
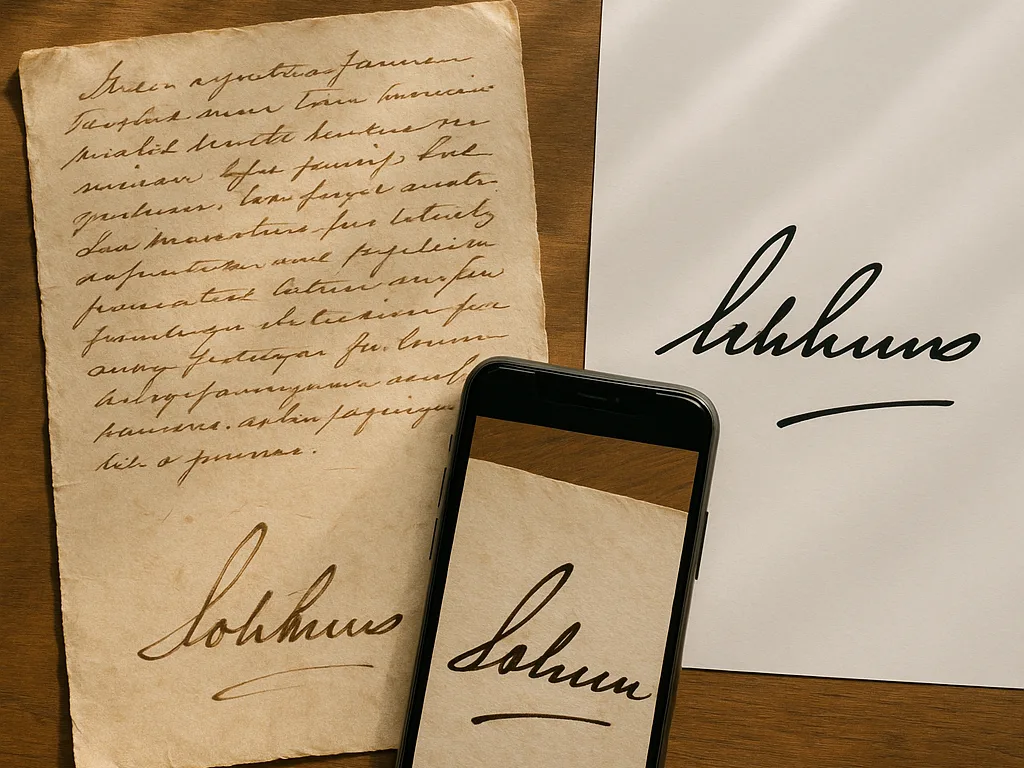
A signature or a line of handwriting is one of the most personal tattoos there is, and usually a memorial. The client brings a birthday card, a letter, a recipe in a parent's hand, often the only sample that exists. The job is to turn that into a stencil without redrawing it, because the moment you redraw it, it stops being their hand. This guide covers photographing the original properly, converting it to clean lines while keeping every quirk, dealing with faded ink and ruled paper, and sizing it so it tattoos cleanly.
Key takeaways
- Photograph the original flat, in even daylight, from directly above, with the camera parallel to the paper. Never crop the sample before converting.
- Convert the photo to line work rather than tracing it. Tracing by hand changes the pressure and rhythm that make it their writing.
- Thicken strokes evenly if the pen was fine; raise contrast to drop ruled lines, paper texture and stains.
- Size with the same minimums as any lettering: strokes no thinner than your needle grouping, enclosed loops at least 2 mm.
Step 1: Photograph the original
Lay the paper flat under a window in daylight, not under a lamp that throws a shadow of the phone. Hold the camera directly above, parallel to the page, and fill the frame with the writing and a margin. Take several shots and pick the sharpest. If the paper is folded or curled, weight the corners with something that is not in the frame. If the only sample is itself a photo or a scan, use the highest-resolution version you can find; a screenshot of a photo loses the fine strokes first.
Step 2: Convert, do not trace
Handwriting is pressure, speed and hesitation. A traced copy smooths all three and the result looks like a font that resembles the person. Converting the photo keeps the wobble, the heavy start of a stroke and the light trailing finish. Stencify extracts the line work from the photo in about 30 seconds; the strokes stay exactly where the pen went. Our photo-to-stencil guide covers what makes any photo convert well.
Step 3: Remove what is not the writing
Ruled lines, paper texture, stains, a coffee ring, the printed text of a greeting card: raise the contrast until these fall away and only the ink remains. If a ruled line crosses a letter and survives, clean the join by hand in the editor rather than redrawing the letter. Faded ink needs the opposite: lower the contrast threshold until faint strokes come back, then thicken them in the next step. Work on a copy so you can return to the original conversion.
Step 4: Thicken strokes evenly
A fine ballpoint or fountain pen leaves strokes thinner than any needle grouping can tattoo. Increase line weight for the whole word at once, never stroke by stroke, so the relative thick and thin of their hand is preserved. Stop when the thinnest stroke matches the needle you will use. Enclosed loops in letters like a, e and o should stay open at 2 mm or more; if thickening closes one, thicken less and let the artist handle it, rather than opening the loop by hand and changing the letter.
Step 5: Size and place it
Signatures tend to be small on the body, which is where they fail: a signature at 3 cm wide has strokes a needle cannot follow. Size by the thinnest stroke, not by the overall width. Measure the placement, set the size, and check it with a try-on on the client's photo so the proportions read right on the forearm, wrist or collarbone. The sizing method is in how to size and print a stencil, and lettering rules in general are in the lettering stencil guide.
Print and keep the original safe
Export a PDF sized for stencil paper and print at 100%. Hand the original back before the session starts. Clients bringing a memorial sample are often anxious about it; make the photo your working copy and the paper leaves the desk as soon as it has been photographed.
Convert the handwriting in Stencify
Photograph the card or letter, convert it in about 30 seconds, raise contrast to drop the paper, thicken the strokes evenly, try it on the client's photo at real size, and export for stencil paper. iPhone, iPad and Android, with two free uses to start: get Stencify on the App Store or on Google Play.
Frequently asked questions
How do you tattoo someone's handwriting?
Photograph the original flat in good light, convert the photo into clean line work rather than tracing it, remove ruled lines and paper texture, thicken the strokes evenly to a tattooable weight, size it to the body, and print the stencil at 100%.
Can a tattoo artist copy a signature exactly?
Yes, by converting a photo of it into a stencil. Tracing changes the pressure and rhythm of the strokes; conversion keeps them.
How big does a signature tattoo need to be?
Big enough that the thinnest stroke matches your needle grouping and enclosed loops stay at least 2 mm open. For most signatures that means 6 cm wide or more.
What if the handwriting is faded or on lined paper?
Lower the contrast threshold to recover faint strokes, then raise it until the ruled lines and paper texture drop out. Clean any remaining joins by hand without redrawing letters.
Related reading
- Tattoo Lettering Stencils - size, spacing and mirroring for any text
- How to Make a Tattoo Stencil From a Picture - photographing and converting references
- How to Size and Print a Tattoo Stencil - getting the size right before printing
- Tattoo Try-On - checking placement on the client's photo
Keep their hand exactly as it was
Stencify converts a photo of handwriting into clean stencil lines without redrawing a single stroke.