Stencil library
Eye tattoo stencil
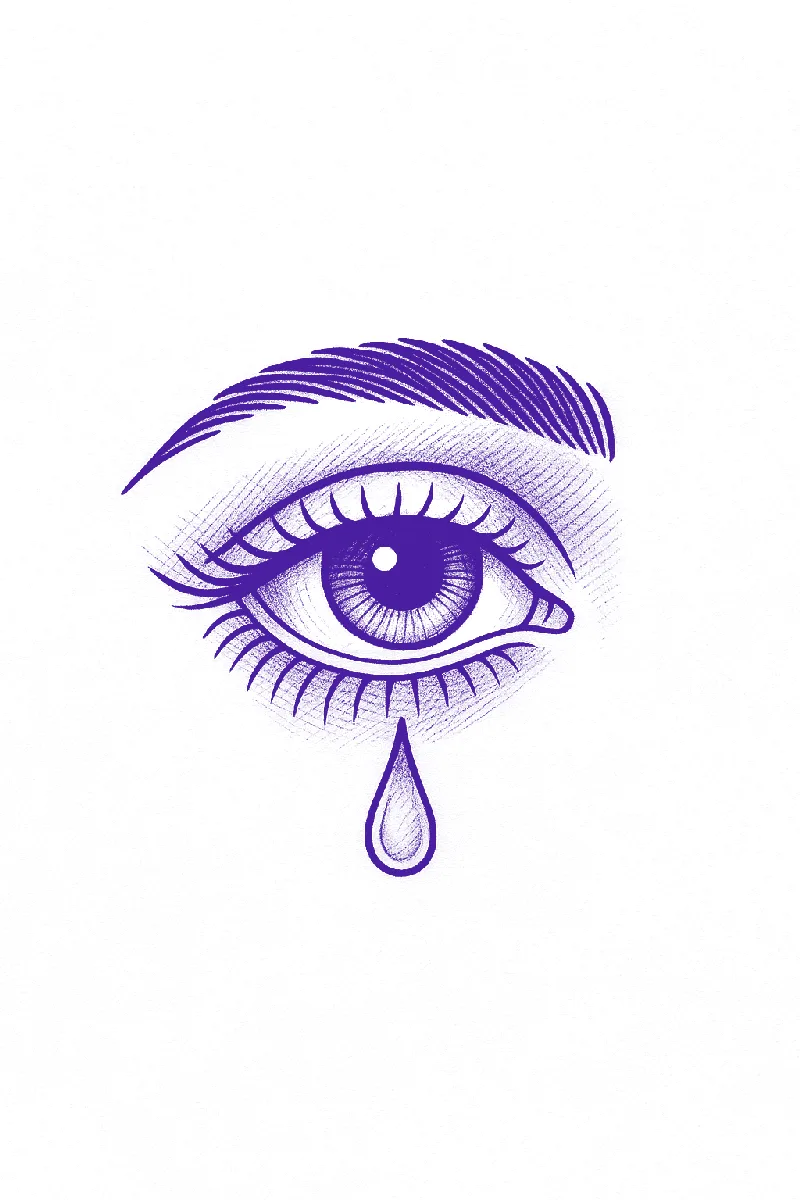
Eye stencils are small, symmetrical and unforgiving. The lid line, the iris circle and the pupil have to be exactly where the artist expects, or the finished eye looks like it is squinting. Photos of eyes also carry skin texture, eyebrow hair and reflections that a converter happily turns into lines. The stencil below keeps the lid edges, the iris and pupil as clean circles, a highlight shape, and the lashes as individual strokes.
- Sample stencil, Stencify style
- Line work for thermal or hand transfer
- Prints on A4 or letter
- Updated Oct 4, 2026
What a good eye stencil needs
- Upper and lower lid lines as single clean strokes, with the inner corner (the tear duct) drawn as a small shape rather than a point.
- Iris as a near-perfect circle cut off by the lids, pupil as a smaller circle inside it, and one highlight shape left white.
- Lashes drawn as individual tapered strokes, heavier at the base. Converted lashes tend to come out as a fuzzy band.
- No skin texture, no eyebrow unless the design includes it, and no crease lines above the lid unless the style is realism.
Styles and how the stencil changes
Realism
Lid lines, iris, pupil, highlight and a few lash strokes. Iris texture is marked lightly or left to the artist.
Fine line and minimal
Outline of the eye shape, iris and pupil only. Often with a teardrop, moon or rays added in the reference.
Traditional and all-seeing eye
Heavy outline, often inside a triangle or with rays. Draw the surrounding geometry before converting so the weights match.
Neo-traditional
Outline plus decorative lashes and a stylised iris. Convert the eye, then add decoration in the editor.
Placement and size
- Inner forearm and wrist: two to three inches wide, horizontal.
- Back of the hand: a classic position for the all-seeing eye at about two inches.
- Sternum and throat: usually a symmetrical design with rays or a triangle; print the full composition in one stencil so it centres correctly.
- Behind the ear and ankle: fine-line eye at under two inches, outline and iris only.
Make your own eye stencil from a reference
- Pick a photo where the eye is open and lit from the front. Side lighting throws the iris into shadow and the converter loses the pupil.
- Crop to the eye and a small margin, excluding the eyebrow unless you want it.
- Convert and raise contrast until skin texture disappears. Check that the iris still reads as a circle.
- Lower line weight for the lashes if they merge into a band, then increase it for the lid lines only if they break up.
- Mirror the stencil in the editor if the design is for the other side of the body. Eyes read wrong when the inner corner points the wrong way.
Stencify does the conversion step in about 30 seconds on iPhone, iPad or Android, with line weight and contrast controls, try-on at real size, and PNG or PDF export sized for stencil paper. The first two uses are free: get it on the App Store or on Google Play.
Frequently asked questions
Why do the lashes in my eye stencil come out as a blur?
Lashes in a photo overlap and vary in sharpness, so the converter sees a textured band. Raise contrast to thin them out, lower line weight, and if they still merge, draw six to ten lashes by hand in the editor.
How big should an eye tattoo stencil be?
Most eye tattoos are two to four inches wide. Below two inches the iris detail will not hold and you should use the fine-line version with no inner texture.
Can I stencil a realistic eye with iris texture?
Keep the texture as a light guide rather than full detail. The stencil marks where the darker spokes of the iris fall; the artist renders them with the needle.
More subjects
Related reading
- How to Make a Tattoo Stencil - the full method from reference to skin
- How to Make a Tattoo Stencil From a Picture - converting photos step by step
- Tattoo Stencil Designs - the full gallery with notes on line weight
Convert your own eye reference
Photo or sketch in, clean line work out in about 30 seconds. Two free uses, then $4.99 a week or $47.99 a year.

