Tattoo Size Chart: Common Sizes by Placement
• by Stencify • 6 min read
"About this big" is the most common size description in a tattoo consultation, and the least useful. A size chart gives you and your client a shared starting point in real units. Below are typical sizes for common placements in inches and centimetres, the minimum sizes that keep detail readable, and how to turn a size into a stencil that prints correctly.
Key takeaways
- Sizes below are the longest dimension of the design. They are typical ranges, not rules.
- The smallest detail decides the minimum size: line gaps of about 1 mm, lowercase letters about 4 to 5 mm.
- Measure the body with a soft tape, subtract a margin, then size the design to that number.
- Print at 100% on plain paper and hold it against the skin before using stencil paper.
How to read this tattoo size chart
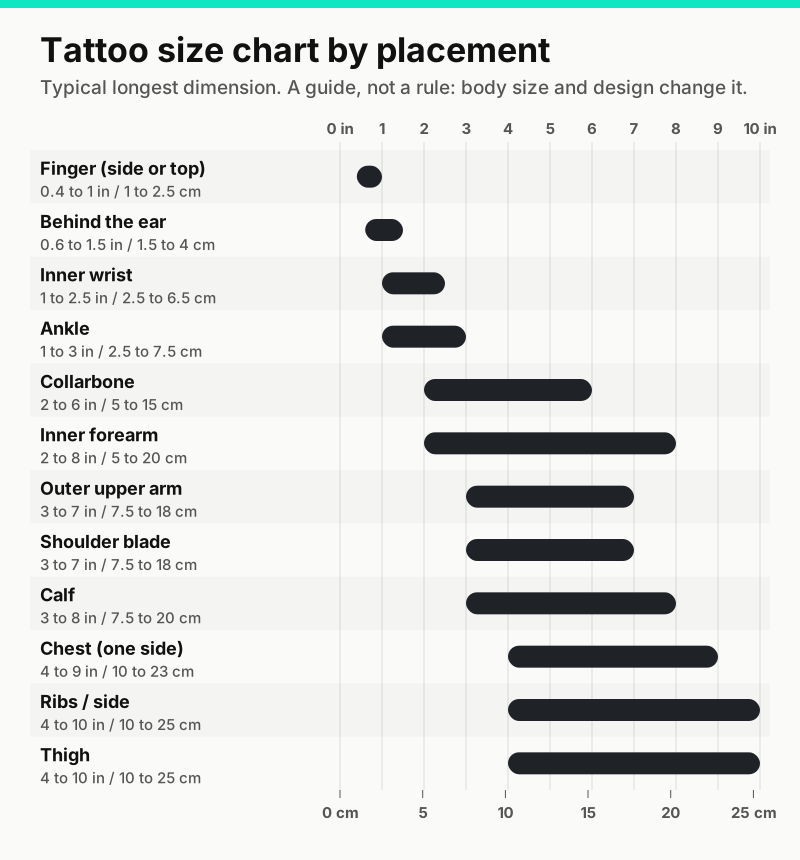
Every range is the longest side of the finished design, measured flat on the skin as you would see it from the front. Ranges are typical for adults. A tall client's forearm takes a longer piece than a petite client's, and a design with lots of open space can sit smaller than one packed with detail. Use the chart to start the conversation, then measure the actual person.
Size chart by placement
| Placement | Inches | Centimetres | Notes |
|---|---|---|---|
| Finger | 0.4 to 1 | 1 to 2.5 | Simple symbols only; fades faster than most areas |
| Behind the ear | 0.6 to 1.5 | 1.5 to 4 | Small outlines and short initials |
| Inner wrist | 1 to 2.5 | 2.5 to 6.5 | Keep clear of the crease where the hand bends |
| Ankle | 1 to 3 | 2.5 to 7.5 | Curves around the bone; check from several angles |
| Collarbone | 2 to 6 | 5 to 15 | Lettering and long, narrow designs |
| Inner forearm | 2 to 8 | 5 to 20 | The most flexible placement for size |
| Outer upper arm | 3 to 7 | 7.5 to 18 | Classic spot for a medium piece |
| Shoulder blade | 3 to 7 | 7.5 to 18 | Mostly flat; good for detail |
| Calf | 3 to 8 | 7.5 to 20 | Wraps strongly; measure the visible front |
| Chest (one side) | 4 to 9 | 10 to 23 | Shape follows the muscle |
| Ribs / side | 4 to 10 | 10 to 25 | Skin stretches with breathing and posture |
| Thigh | 4 to 10 | 10 to 25 | Large, fairly flat canvas |
| Full back | 12 to 24 | 30 to 60 | Usually drawn across several stencil sheets |
Sleeves and back pieces are usually described by coverage rather than a single measurement, because they wrap around the body. For those, the size question becomes how the design flows around the limb. Our guide to placement and anatomy covers that.
Small, medium and large
There is no industry standard for these words. As a rough guide, many artists would call a piece up to about 2 inches (5 cm) small, about 3 to 6 inches (7.5 to 15 cm) medium, and anything above that large. Because studios use the words differently, a measurement is always clearer than a label.
Minimum sizes for detail and lettering
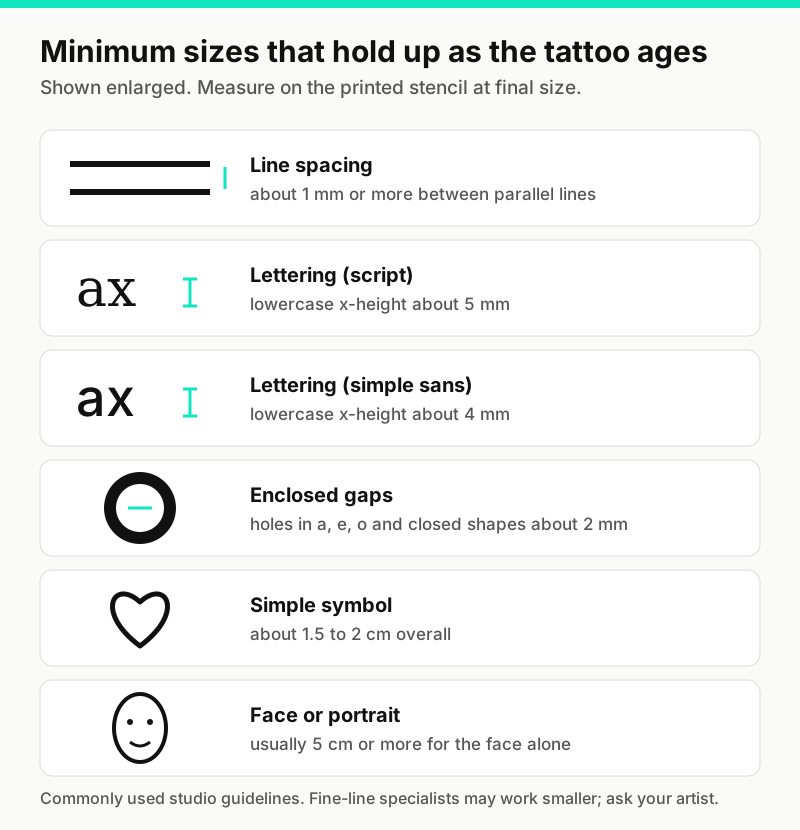
The chart tells you what fits a placement. The smallest detail in the design tells you how small it can go. Ink settles and spreads slightly under the skin over the years, so lines that sit close together on paper can merge, and small enclosed gaps fill in. The guidelines below are widely used in studios. Fine line specialists may work smaller with their own technique, so treat them as a safe default.
| Detail | Common minimum at final size |
|---|---|
| Gap between parallel lines | About 1 mm |
| Lettering, simple sans serif | Lowercase x-height about 4 mm |
| Lettering, script | Lowercase x-height about 5 mm |
| Enclosed gaps (inside a, e, o, small loops) | About 2 mm |
| Simple symbol | About 1.5 to 2 cm overall |
| Realistic face or portrait | Usually 5 cm or more for the face alone |
A quick test: if you cannot keep a 1 mm gap between the closest lines at the planned size, either make the design bigger or remove detail. Both are better than squeezing. Our small tattoo ideas post lists designs that survive at the small end of the chart, and the lettering stencil guide covers word length and spacing.
Judging size without a ruler
Clients often find numbers hard to picture. Everyday objects with fixed sizes help:
- A bank card is 85.6 x 54 mm (about 3.4 x 2.1 inches) under the ISO/IEC 7810 ID-1 standard used by most payment cards.
- A US quarter is about 24 mm (0.96 inches) across. A one euro coin is about 23 mm.
- A sheet of US Letter paper is 8.5 x 11 inches. A4 is 210 x 297 mm. That is also the largest single stencil most printers produce.
Even better is the real thing: print the design at 100% on plain paper, cut it out roughly and hold it against the placement in a mirror. It costs a sheet of paper and settles most size debates in a minute.
How to size the stencil
- Measure the placement with a soft tape held flat on the skin. Take the longest length and the widest width the design may occupy.
- Subtract a margin of about 1 to 2 cm so the design does not run into joints, creases or the edge of the visible area.
- Check the smallest detail against the minimums above at that size. If it fails, simplify or go bigger.
- Set the document to real units and place the design at the measured size. Pixel dimensions say nothing about printed size.
- Print at 100% with every "fit to page" option off, and check one dimension with a ruler.
The full process, including designs larger than one sheet, is in our guide on how to size and print a tattoo stencil.
Resizing a design changes its line weight
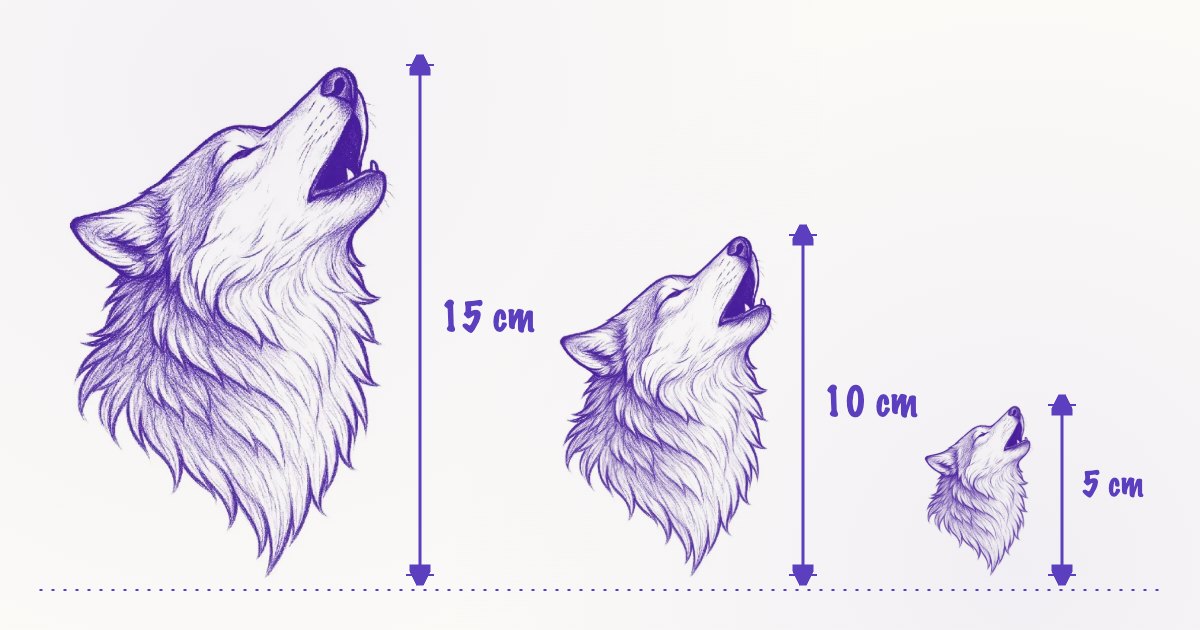
Scaling a design in software scales everything with it, including the lines. Shrink a 15 cm drawing to 7 cm and every line becomes half as thick, often thinner than the needle grouping you plan to use. Enlarge a small drawing and the lines get heavy and blunt. After any big change in size, look at the line weight again at the final size.
- Going smaller: thicken lines back to a tattooable weight, then check whether the gaps between them still clear about 1 mm. If they do not, remove detail.
- Going bigger: thin heavy outlines back down, and consider adding detail that the larger size can now hold.
- Lettering: resize the text as text, not as an image, so letter shapes and spacing stay clean.
This is one reason a stencil made for one size rarely works at another without a pass over the linework. Our guide to line weight and contrast in stencils goes deeper on choosing weights.
Curved placements change the numbers
A flat measurement and a wrapped measurement are different on curved areas. A 10 cm design on a calf or upper arm wraps partly around the limb, so from the front it looks narrower than the paper. Measure the footprint you see from the main viewing angle, and for wide designs on limbs, place the stencil and step back to check it before you commit. A try-on preview on a photo of the client helps here: Stencify places the stencil on the photo at the exact size, so you can see whether 8 cm reads well on that particular forearm before printing, then prints it at that size in centimetres or inches, with a ruler on each page to check the printer did not scale it. It runs on iPhone, iPad and Android with two free uses: get Stencify on the App Store or on Google Play.
Frequently asked questions
What size is a small tattoo?
Most artists would call anything up to about 2 inches (5 cm) small. Studios define small, medium and large differently, so give your artist a measurement instead of a size word.
What is the smallest size for a tattoo with words?
A common guideline is a lowercase x-height of about 4 mm for a simple sans serif and about 5 mm for script. Below that, letters tend to blur as the tattoo ages.
How big is a palm-sized tattoo?
Roughly 3 to 4 inches (7.5 to 10 cm) across, but palms vary a lot. Measure the area on the body with a ruler instead of relying on the phrase.
How do I know what size my tattoo should be?
Measure the placement, subtract a margin, check that the smallest details stay above the minimum sizes, then print the design at 100% on plain paper and hold it against the skin.
Related reading
- How to Size and Print a Stencil - measuring and printing at 100%
- Small Tattoo Ideas - designs that survive being small
- Tattoo Lettering Stencils - minimum letter sizes and spacing
- Tattoo Placement and Anatomy - fitting a design to the body
See the real size before you print
Stencify previews your stencil on a photo of the placement at the exact size, then exports a PDF sized for A4 or US Letter.